How to Setup Firebase Authentication in React

We design & develop free & premium Dashboard Templates in Bootstrap, Reactjs, Angular, Vuejs & many more that elevate your admin panel experience effortlessly.
When you build an application, we want to provide a user personalized experience. This is made possible using user authentication, where user login into the app and access the personal information from an account or social feed.
In this article, we will get to know how to react to app authentication with a firebase. Before starting the authentication process let’s get a brief introduction of Firebase and react.
What is Firebase?
Firebase is a backend-as-service. It provides a developer variety of tools and services to help them develop a quality app and user base. It’s built using Google development infrastructure. Firebase categorized as a NoSQL database program, which stores the data in JSON like a document.
What is a React?
React is a front-end development tool that is open source, a JavaScript library for building user interfaces or UI components.
Basic system requirements for authentication
A Firebase account
NodeJS vs .x .x or higher installed with npm/yarn
Create-react-app global module to scaffold a react project
Create a React App
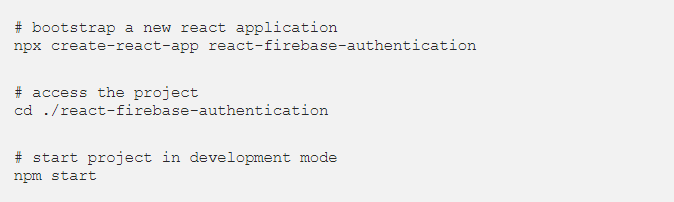
To create a new react app, first, we need to install a create-react-app by run the below command in your terminal window.
Start a new project using firebase
To get started you need a Firebase account. To sign up and log-in visit: console.Firebase.com. Once you logged in you will see the below screen.
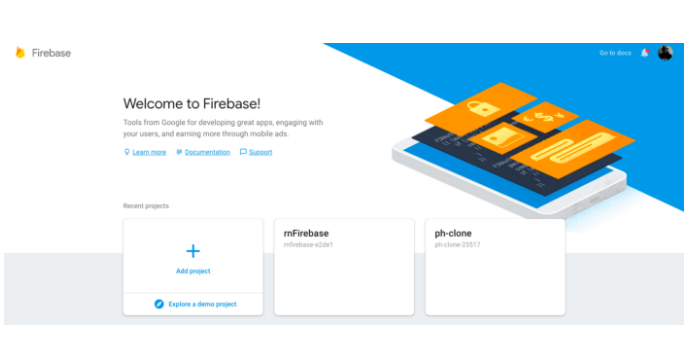
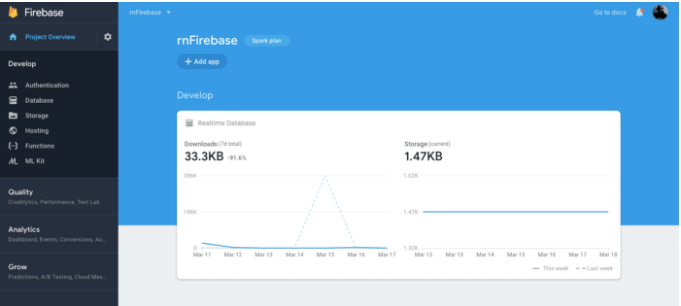
Fill in the detail and click on create a project. Once the project created, you will see the below screen.
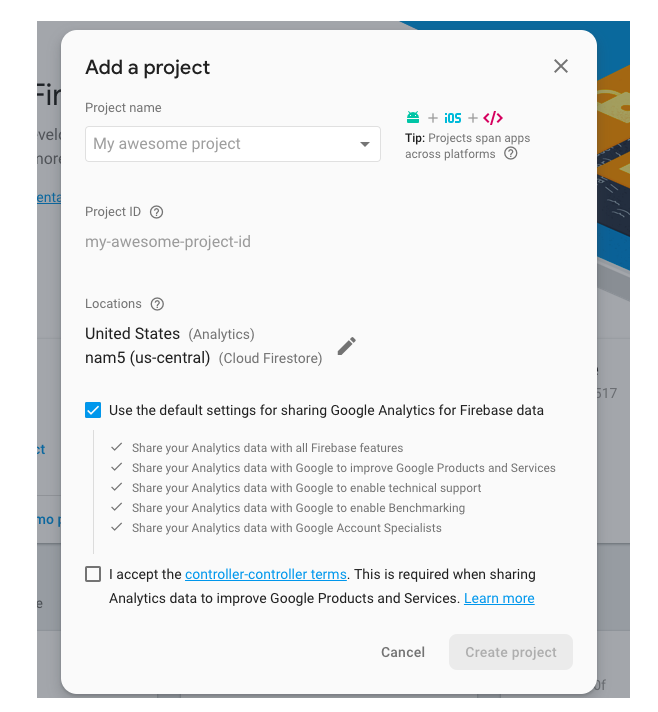
Click on the Add Project button. This leads to another screen which contains a form to fulfill to create a new project.
Go to the Authentication page.
Click on the “Sign-in method” tab and make sure you have Google-enabled as a sign-in provider.
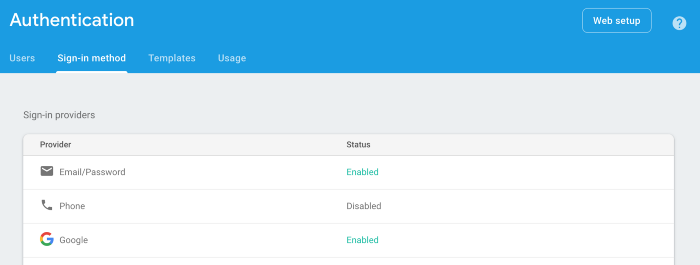
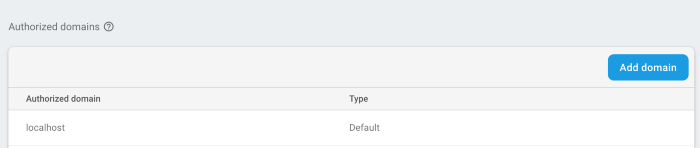
Scroll down a bit and also make sure you have localhost as an Authorized Domain:
On the top of the Authentication page, click on the “Web Setup” button.
Copy the config variable and paste it to a file called firebaseConfig.js. Export it afterward. It should look something like this:
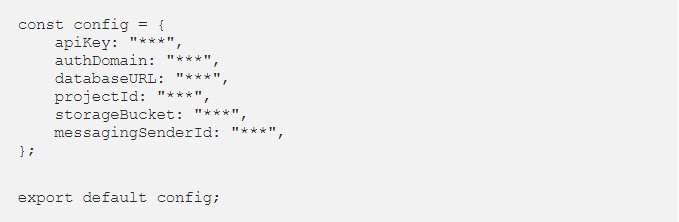
Keep this file stored in src/FirebaseConfig.js .
Now we’re going to install Firebase libraries and a Higher Order Component through NPM. Run the following command:

Currently, your application is a CRA default application We’ll modify the src/App.js component. Insert these four imports to the top of the file:

Initialize the Firebase app using the configuration:

Note: To integrate Firebase with our React app, we only need the initializeApp() method to pass all the keys required to configure from the Firebase.
Setup the providers we want to support and access the auth library:

Wrap the export of the App component using the withFirebaseAuth HOC:

Now we can access the properties provided by the withFirebaseAuth HOC in the App component.
It provides us with the user, an error, and some signIn and signOut methods as properties.
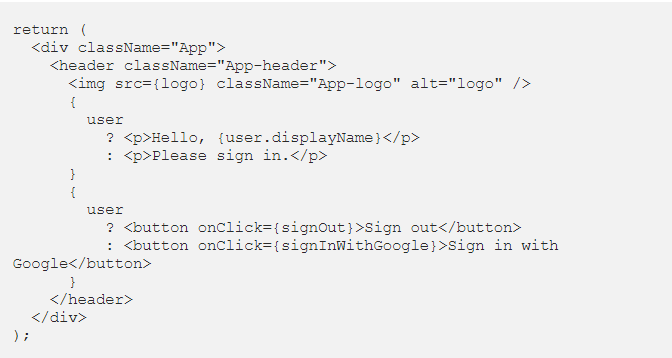
So we can add this to our render method:

And change the markup to ask the user to sign in or sign out:
If you check on https://localhost:3000, you can see:
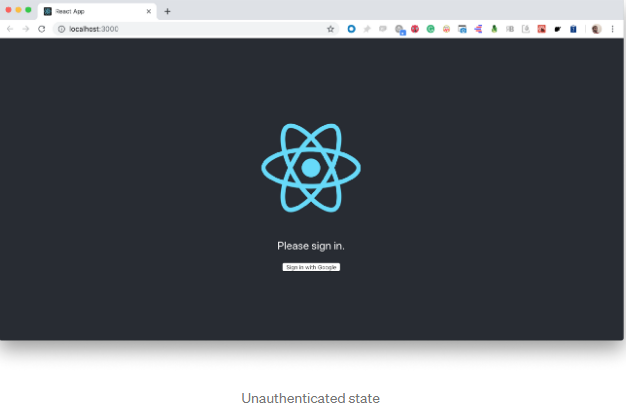
You can then click on the Sign in with Google button to popup the Google Login Modal.
After granting access, you’ll see something like this:
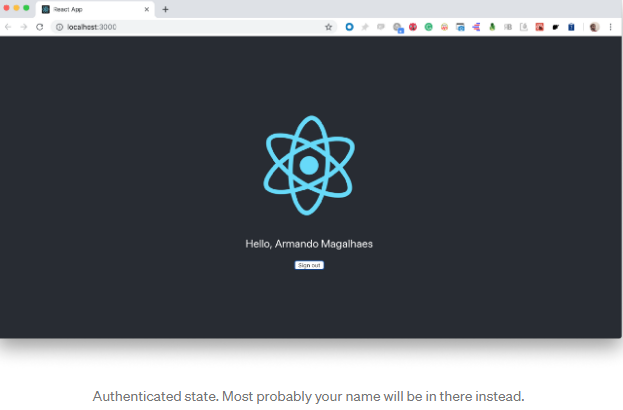
If you refresh the page, it will keep your user logged in as long as Firebase considers the credentials still valid.
Read More Article Visit: Click Here


